For those who just want to see the two - soap and picture, here you go:

The rest of the story is below.
I wanted this soap to fulfill multiple goals.
1. Compete in the challenge. This is my first attempt at this kind of "painting in soap" approach.
2. Try out my new 5 lb soap mold.
3. Complete the soaps for my soap swap (Make 10 bars using a fragrance sold by www.brambleberry.com - My fragrance is Ginger Patchouli.)
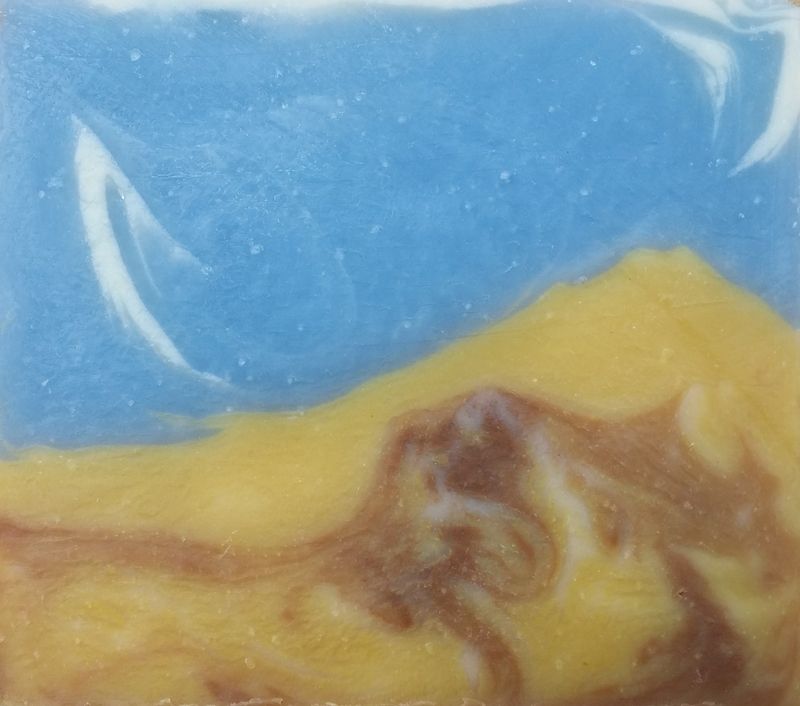
For the Ginger Patchouli fragrance, I decided on a color theme of brown/red/orange. I landed on a few desert scenes. Keeping my skill level in mind, I chose the above photo (from http://wallpaper.mob.org/image/landscape-sand-desert-9018.html), because it is simple enough for me to do, but still interesting, yet complex enough to make it a fun challenge.
Having learned from the last few challenges that a practice batch is a good idea, I decided to use this batch to figure out the right technique to build a sand dune in my soap. While the color proportions were not quite there, I learned that I can, in fact, make a "hill" in soap, as well as build differently-shaped layers.

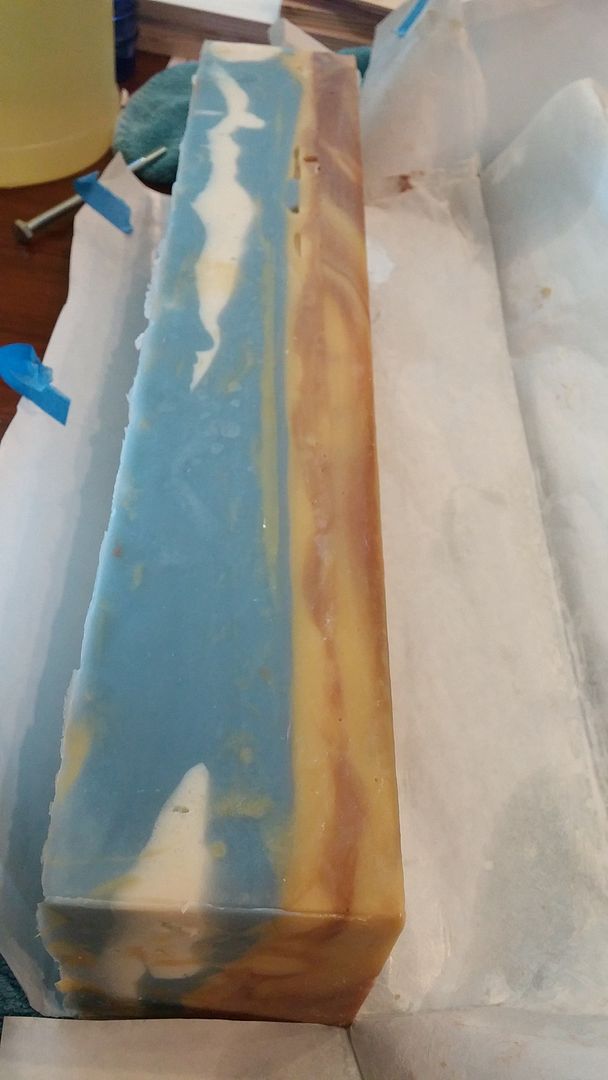
There were some issues with how quickly that soap "set up" and as a result, the colorant was not properly mixed into the top layer. So, I went with a different recipe for my actual challenge soap. A recipe I have made several times, and like for the working time as well as the finished product. I don't have a mixing vessel large enough to do an entire 5 pound batch of soap, but since I have two distinct color sections in the soap, that was not an issue for this one. I just made two smaller batches. That also alleviated the potential for the blue to set up while I was still working with the brown and yellow. That turned out to not be an issue - I ended up waiting on the brown and yellow quite a while before I could add the blue! I didn't take any in-progress pictures - messing with the shape of the soap in the mold can be messy, and I didn't want to mess up my camera in the process! But I do have a few photos of the soap once completed in the mold, and then as a log, just out of the mold.

Here, you can see it as it's gelling. Gel doesn't always happen, but I think this mold encourages it, which is fine with me because the colors tend to be brighter when gelled. You can see a bit of the remaining batter in the pink mold, not gelling. It is a pretty color, but much more pastel.
 This is just out of the mold. It looks so pretty here, but I can't wait to slice into it!
Here they all are, looking picturesque after slicing. (on their sides)

I learned a lot on this one. I sure am excited that the soap did exactly what I told it to do!
Now I need to finish up that knitted mitt design, and get it ready to go out for the mystery knit a long in April!
5 comments:
very nice, love the sand dune!
Love the way you caught the shadow in the sand dune.
Great job!! Your soap is really similar to the photo - love how you captured the shape of the sand dune! The clouds look really cool too - very wispy and beautiful against the blue sky. :)
The sand is beautifully colored, and I love the wispy nature of the clouds...great job!
Really nice work creating the sand dunes.
Post a Comment